The UltraQ can be used without connecting it to another device via Bluetooth or Wi-Fi. Follow the instructions below to manually control your UltraQ.
SETTING THE PIT TEMPERATURE
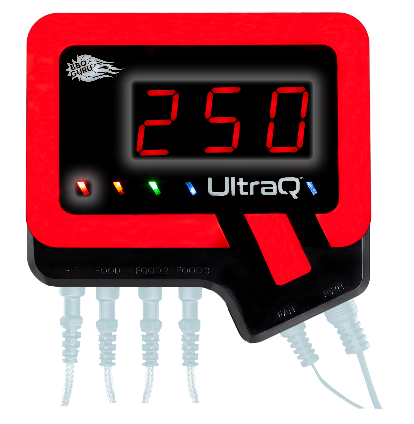
Once the control has booted, the actual pit temperature reading will be displayed on the screen. The default pit temperature setpoint is 250°F.
Step 1: There are three buttons on the left side of the control. To set the target temperature, press and hold the middle SELECT button for 2 seconds. The digital display will blink.
Step 2: Press the UP or DOWN buttons while the display is blinking to adjust the target temperature by 1°F. Press and hold the UP or DOWN buttons to change the target temperature faster. It will increase or decrease by 1°F for the first 4 seconds, and then it will increase or decrease in 5°F increments every second thereafter.
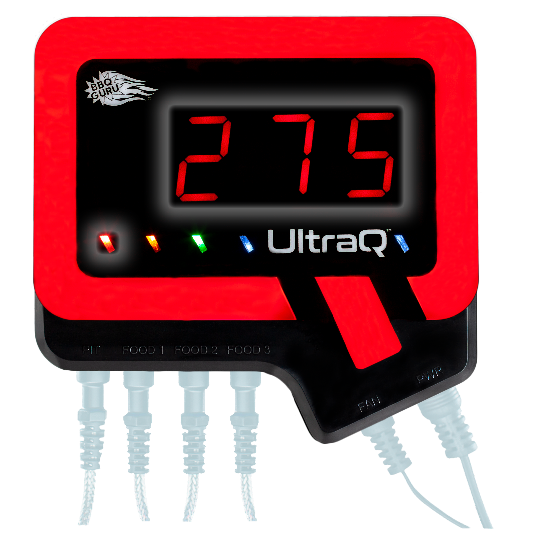
PIT ADJUSTED TO 275°F
Display and LED indicator are still blinking.
Step 3: When the temperature is at your desired setpoint, press the SELECT button to lock the temperature.
SETTING THE FOOD TEMPERATURES
The food done temperatures are set to a default of 185°F. Each food probe port has a corresponding indicator light just above the jack where each probe is plugged in.
- Food 1 – yellow
- Food 2 – green
- Food 3 – blue
Step 1: Press the SELECT button to cycle from the current pit temperature to the Food 1 temperature.
Step 2: Press and hold the SELECT button for 2 seconds. Use the UP or DOWN buttons to set your desired food done temperature by following the same instructions for setting the pit temperature.
To set additional food done temperatures, repeat the steps mentioned above.

NOTE: The control is made in the shape of a Q. The tail of the Q will light up to match the same color as the probe indicator lights so it is easy to determine which temperature is being displayed.
NOTE: If no probe is plugged into a particular probe jack, the display will show “---".
INVOKING SCAN MODE
The control will display one temperature at a time. To invoke scanning of all temperatures, hold the DOWN button for 2 seconds.

The control will cycle through all four temperatures at 2 second intervals. The corresponding color for each probe will illuminate the tail just as when the desired temperature is set. The outer ring of the Q will always display the current pit status. The tail will change accordingly to indicate which food temperature is being displayed.

Was this article helpful?
That’s Great!
Thank you for your feedback
Sorry! We couldn't be helpful
Thank you for your feedback
Feedback sent
We appreciate your effort and will try to fix the article